

|
|
|
|
|
|
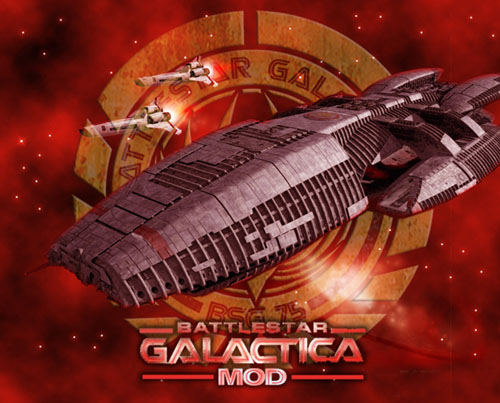
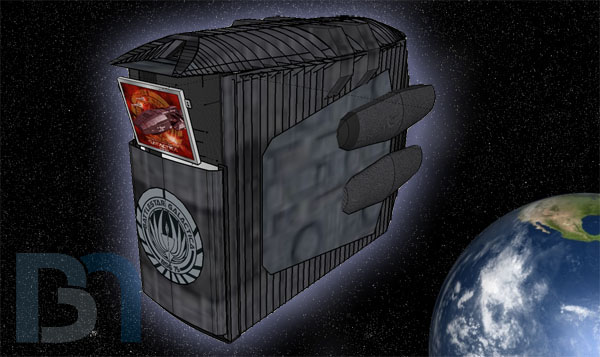
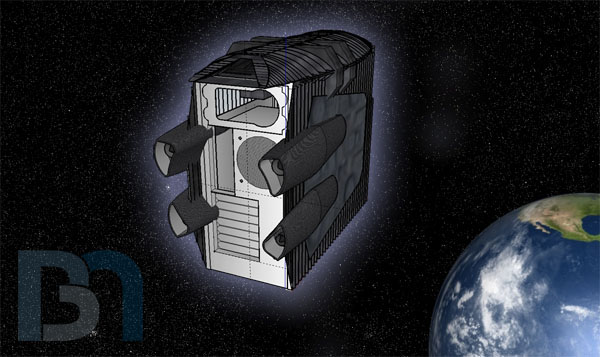
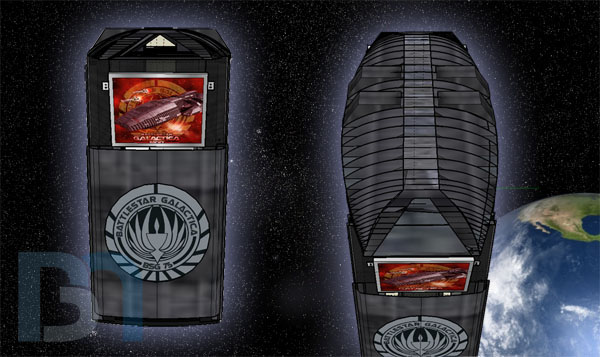
Conceptual designs:
Work Begins 3/25/07

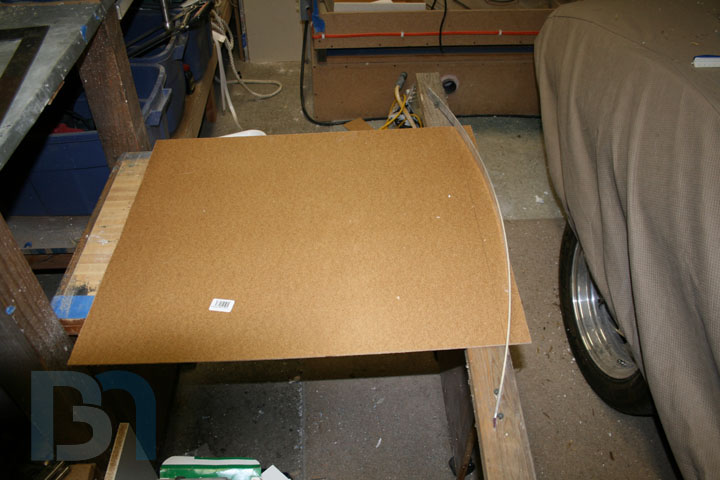
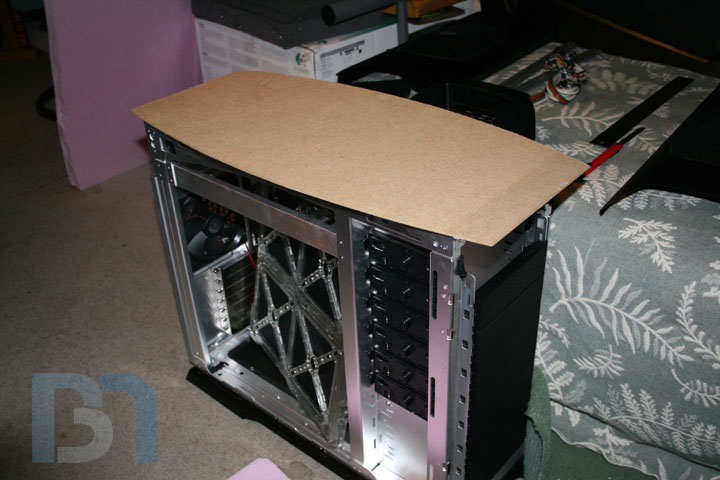
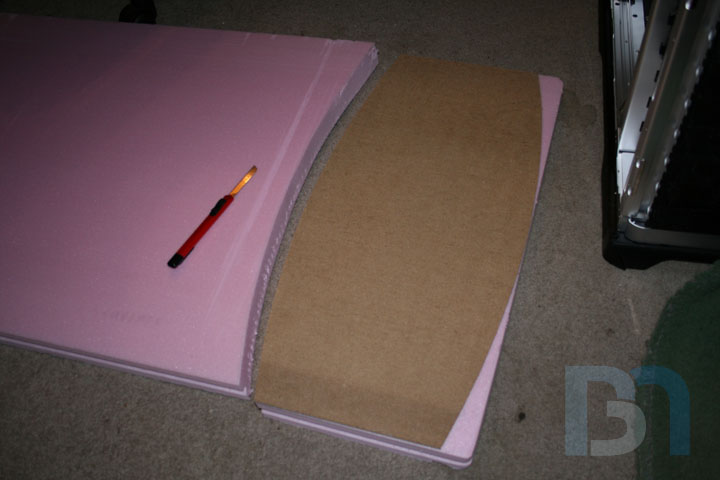
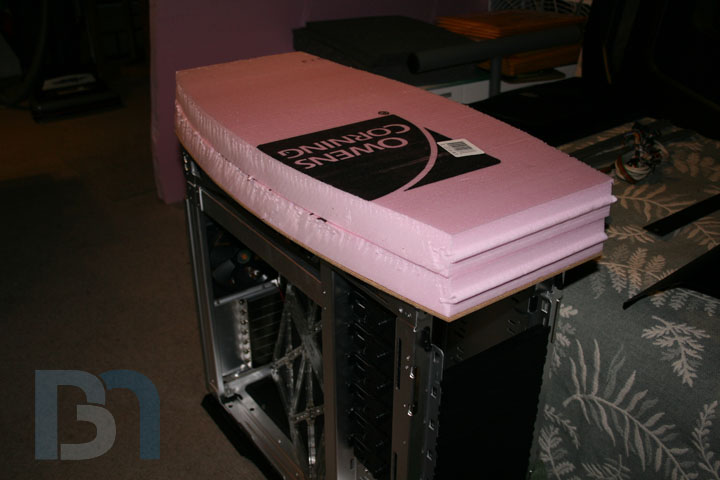
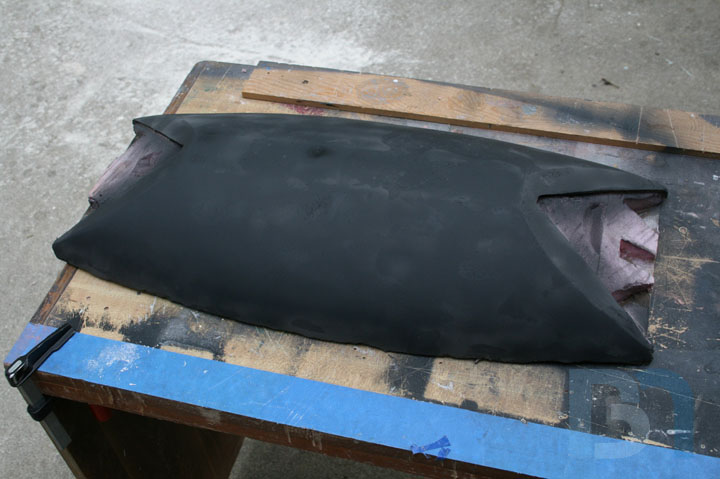
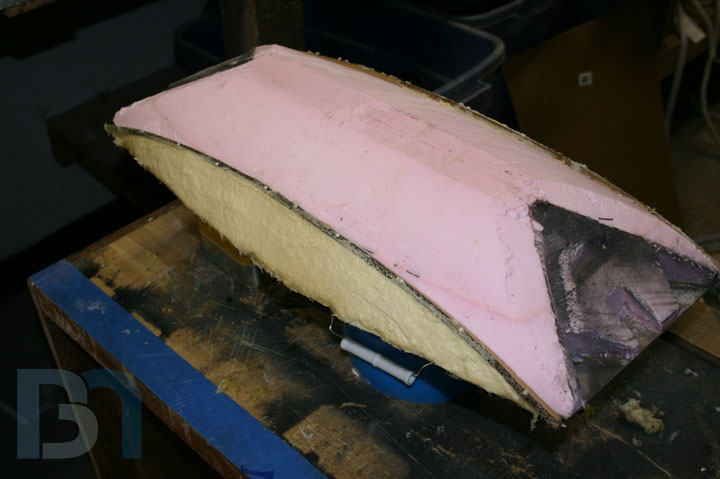
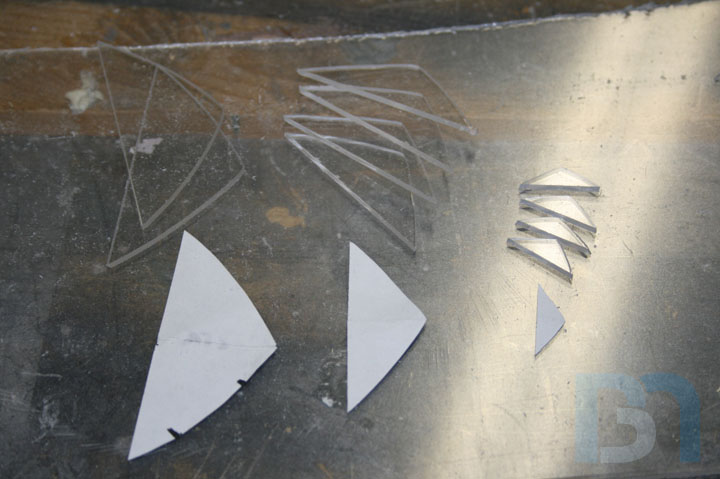
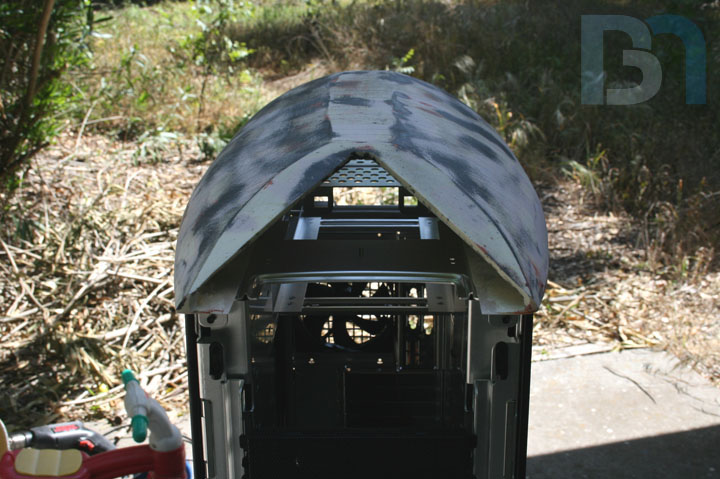
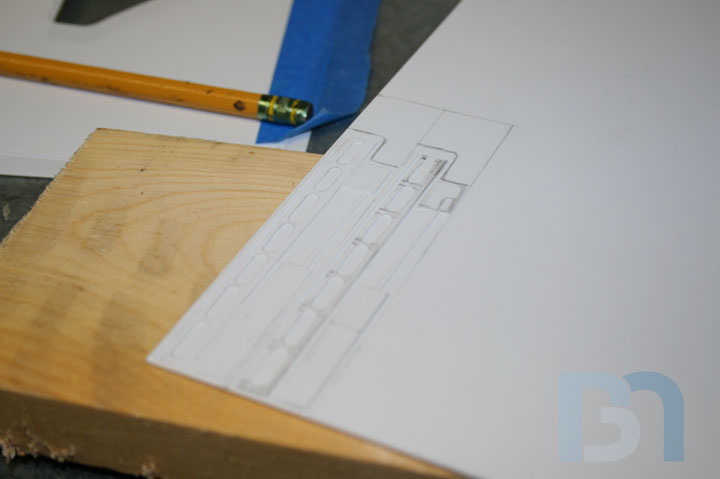
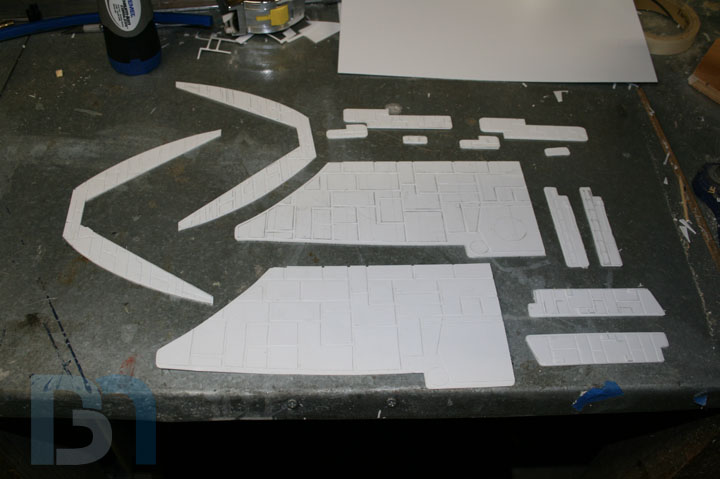
First step in any case modding project: dismantle the donor case! Started with a 1/8" piece of fiber board. Traced my lines and cut out my shape. This will serve as the base for my landing bay construction. Placed it on top of the foam and cut. On top of the case for fit. Next comes the shaping!
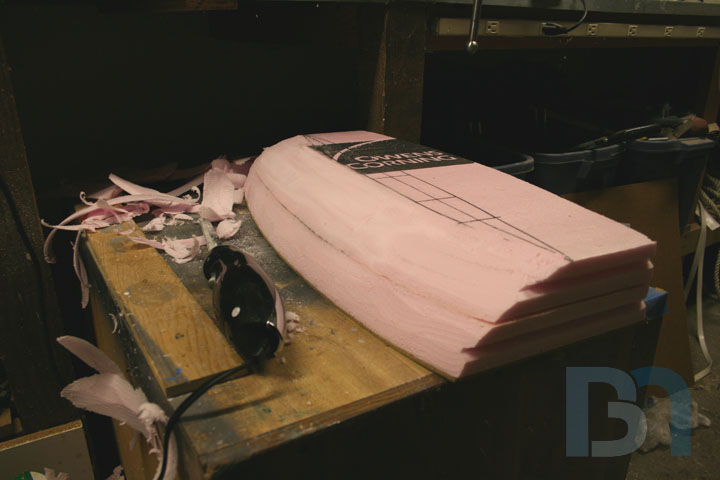


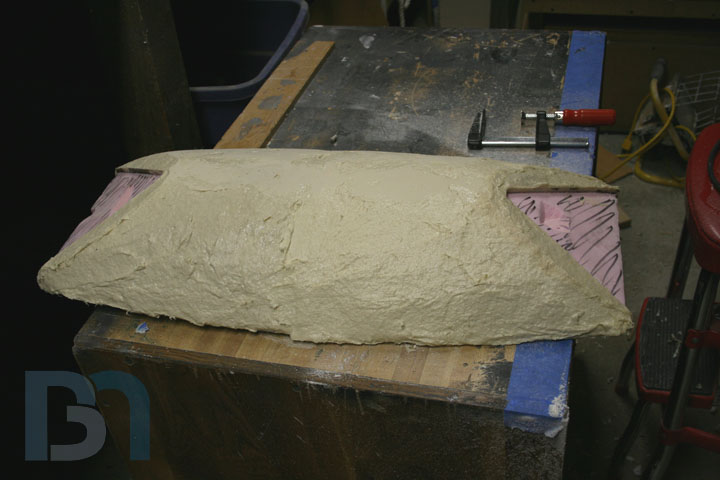
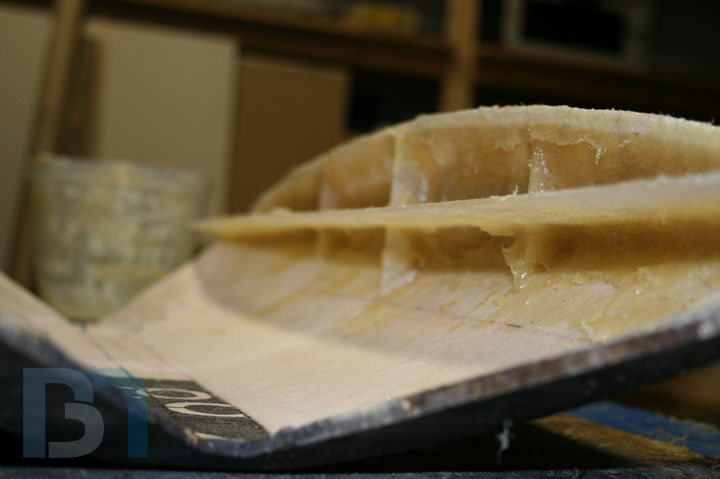
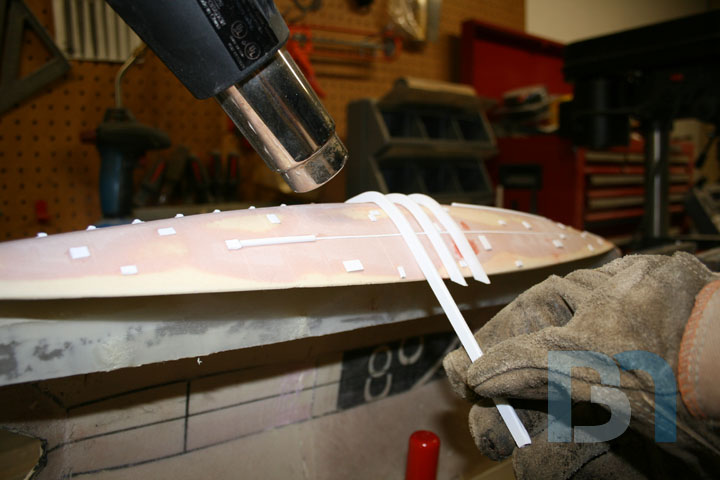
I started shaving the foam down to the landing bay shape. Then I took the drywall sander and rounded the sides smooth. And yes, I was wearing a respirator the whole time.Then I hacked off the ends, and marked the eventual openings. Since that Plasti-Paste has just a 10minute pot life (length of time you have to work with the stuff before it sets up), I cordoned off sections with strips of cardboard held in with brads. The Plasti-Paste comes in two containers: One with the fiber reinforced paste, the other a liquid. Mix the two at a 3:1 ratio respectively. I mis-judged the amount slightly for my first section, and had a bit left over. So I spread what was left over the other half. You can almost watch the stuff set up. It changes color from the dark brown paste to the light yellow plastic within minutes. Here you can really see the color difference between the first hardened section and the one I just laid down. Completely cured and ready to sand smooth. I actually messed up and forgot to smooth it out more before it set up. Now I have more sanding work to do.
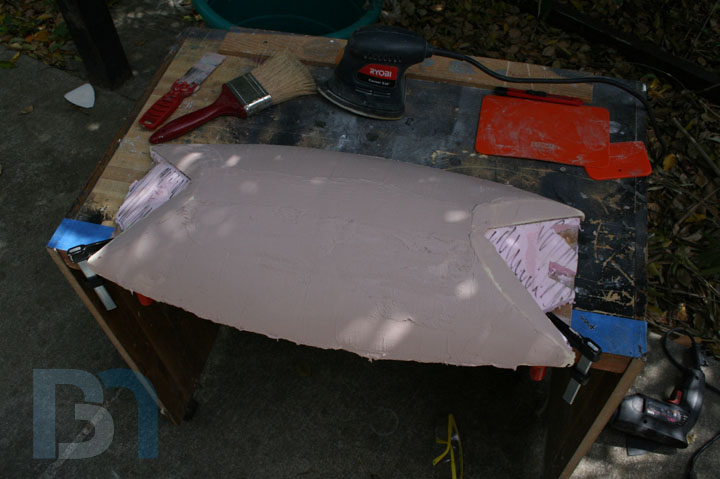
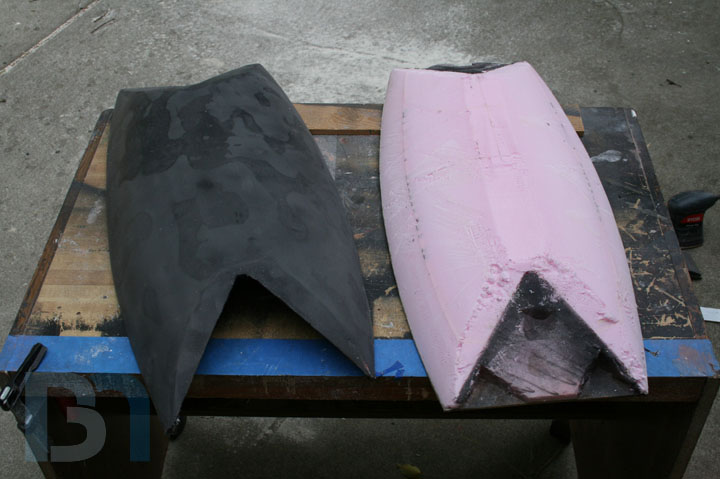
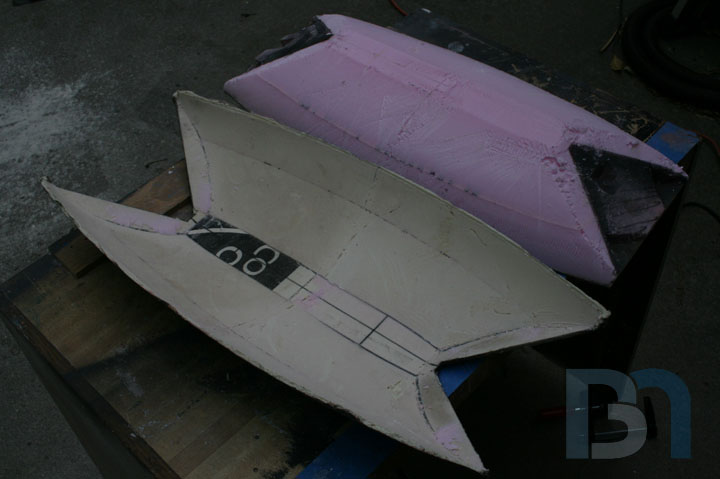
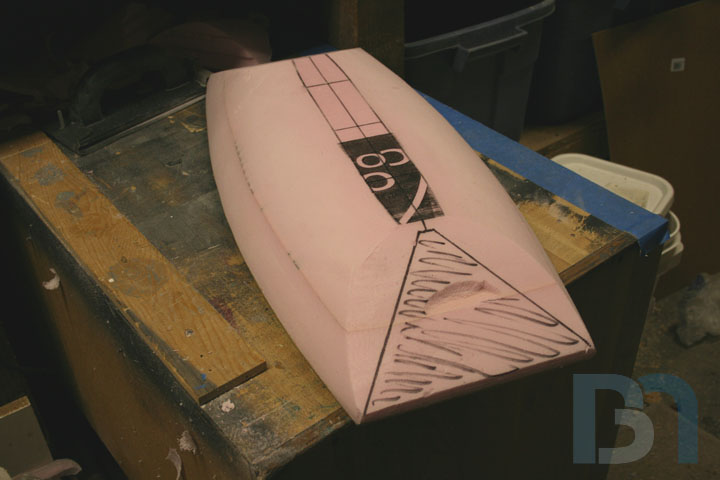
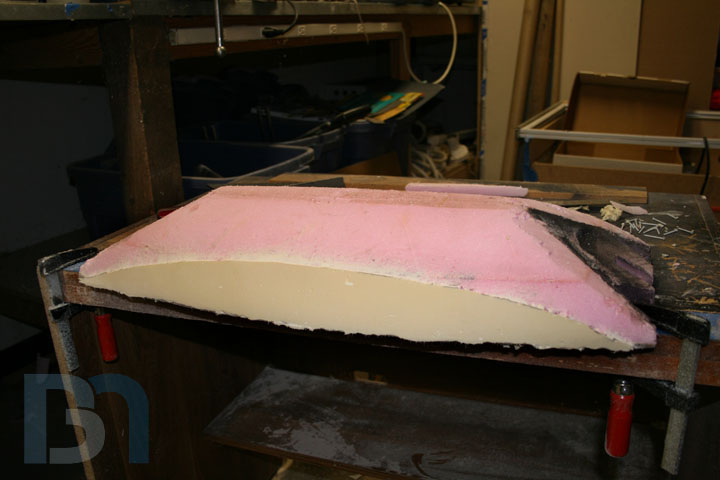
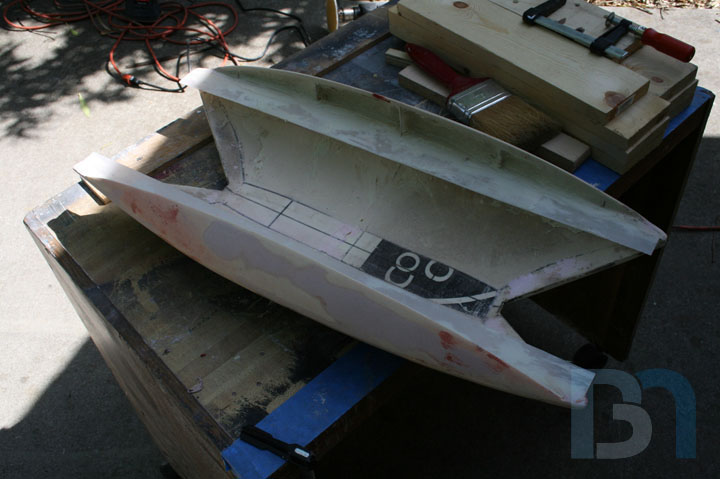
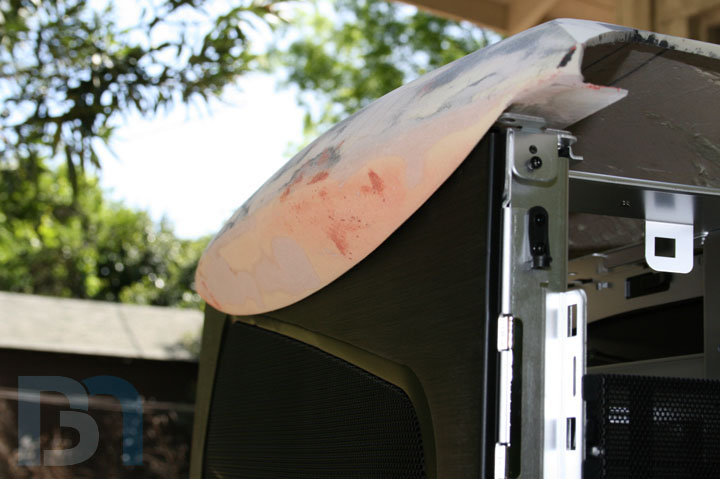
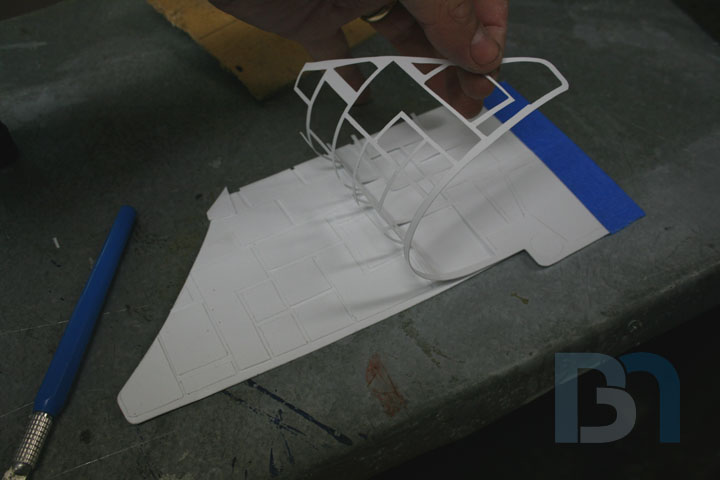
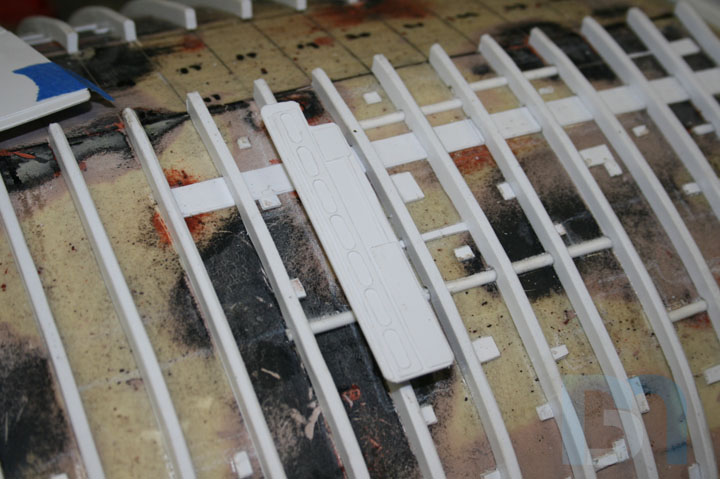
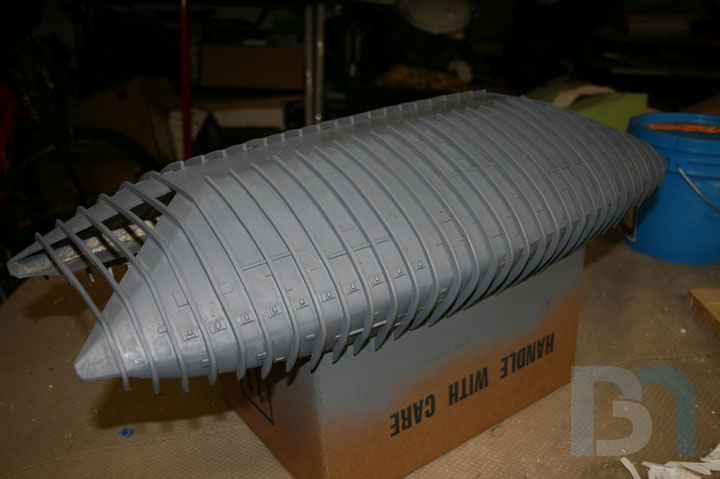
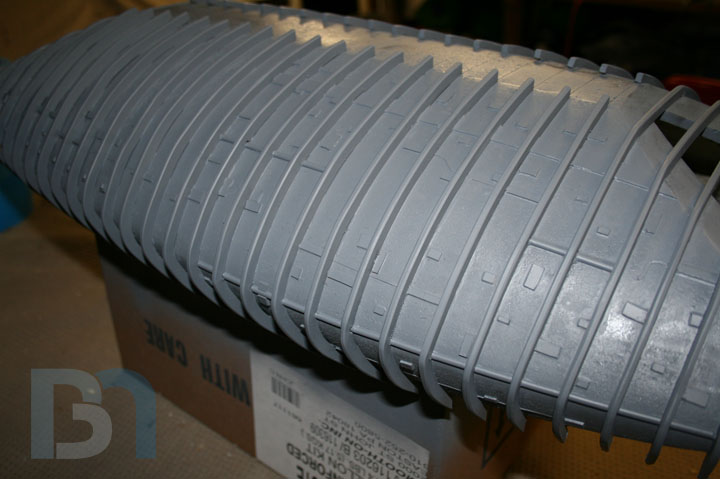
Got the whole thing sanded down pretty well with the drill and sanding discs, followed by the orbital. Then I layed on a skin coat of bondo to fill in the low spots, and sanded that smooth. You can really see how uneven it was. Lastly, I filled in the tiny air holes with the glazing putty. Since this is the bottom layer and will be topped with all those ribs, it doesn't have to be sanded down perfectly smooth. My main goal was to get these pronounced lines on each end. Sprayed a light coat of primer on to get a uniform color. And demolded the piece. I was careful not to ruin the foam because I still need it. Shot of the underside. Funny, it actually transferred my markings from the foam to the plastic! Here I started marking out the ribs. I figure one rib every 1/2" looks about right. Here I am forming the side skirts of the landing bay. These will attach under the overhangs on each side of the bay. The ribs will continue from the top , over the edge and onto these pieces. You'll see what I mean a bit later.
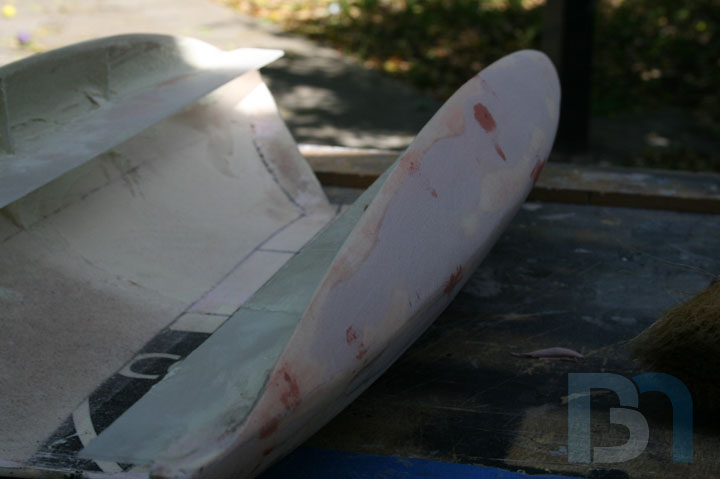
Did some work on the side skirts. Got them smoothed down, and trimmed. This is how they will fit onto the main piece. I taped them into place, and will add some support braces for strength. Once those are in, I will bondo up the seam and smooth out the edges.

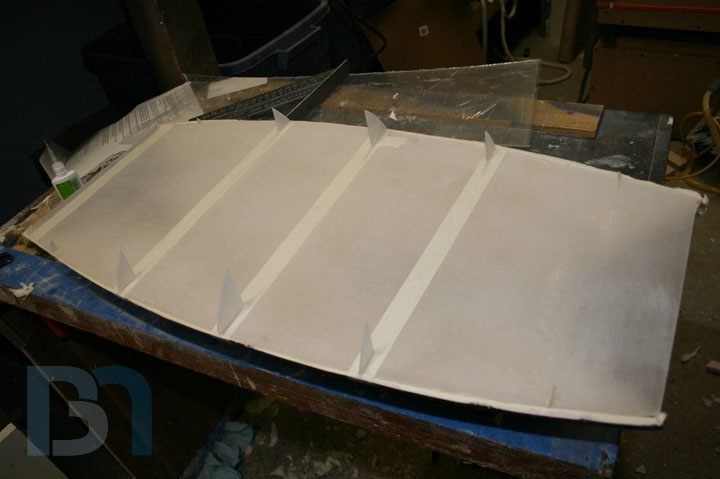
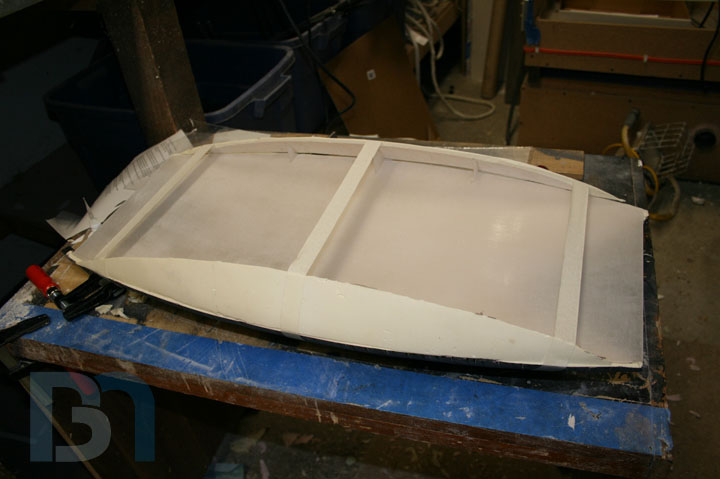
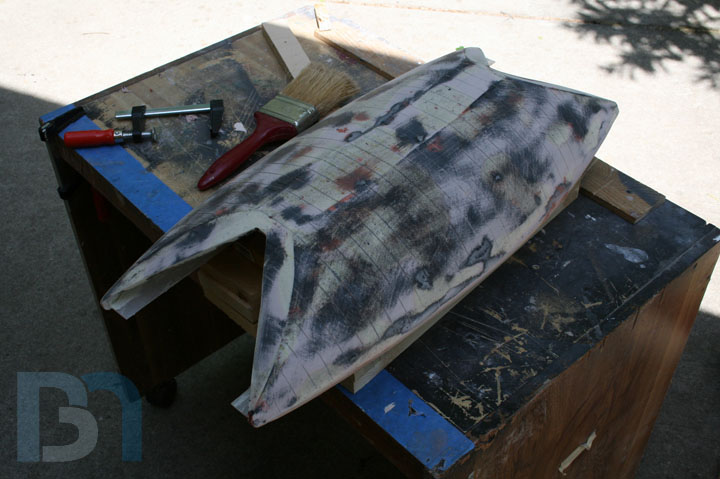
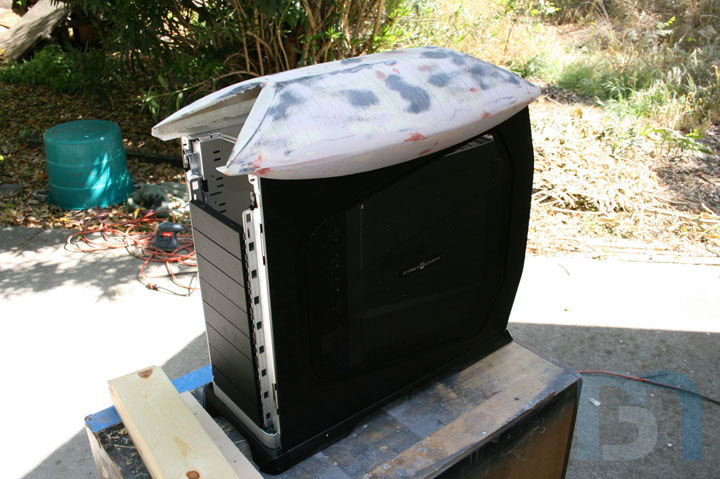
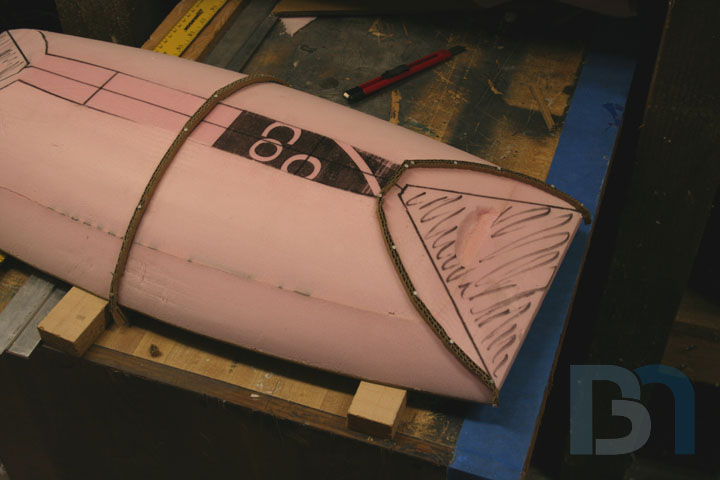
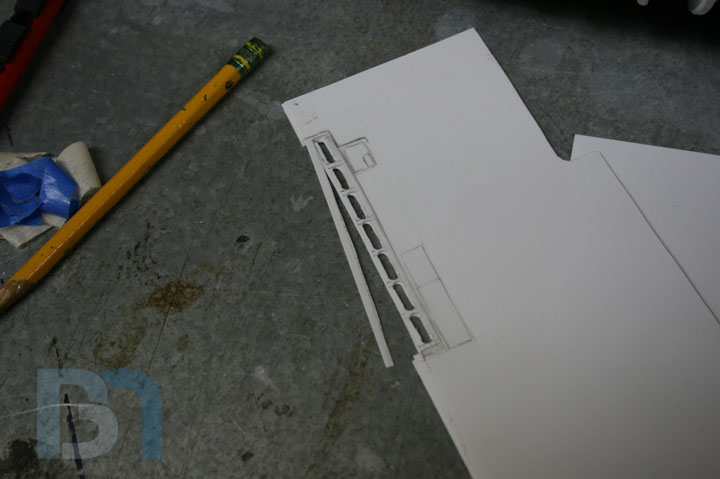
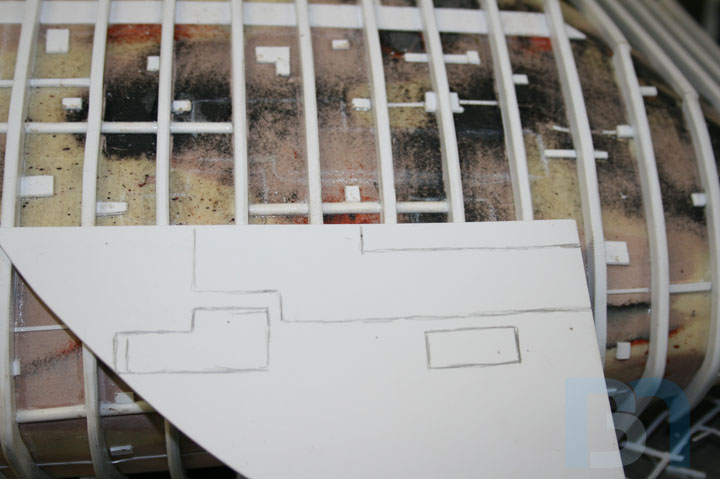
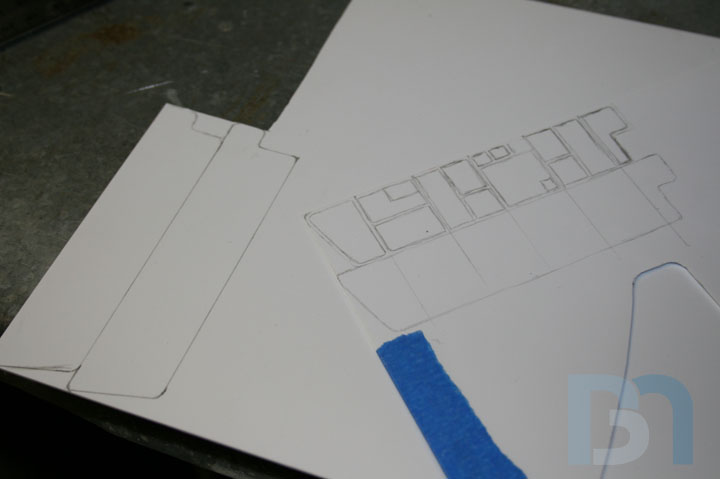
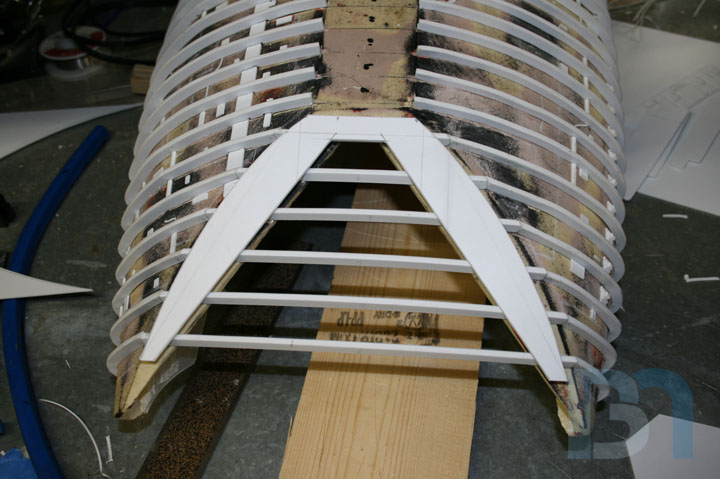
I managed to get the side skirts integrated onto the main piece. Here's how I did it: First I needed to make a paper template for the inner braces that will hold the side skirts in place. Since I formed them on the same foam buck as the main piece, they should be a mirror image of it. So I took a piece of paper, folded it in half and cut it to fit the curve with the fold facing up. I strung a piece of tape across for something to square off of. I unfolded it and cut my braces. Made two of those, then made two smaller shapes and cut four of each so I ended up with five braces per side. Next was to cut a floor with notches for the braces. I used the built-in line in the plastic (made from the wood base of the foam buck) as a guide to glue down the floor. Then I glued in the braces, making sure they were square. When those set up, I tacked down the side skirts. It didn't matter too much that there were some gaps here and there, as you'll see in the next step. Out came the Plasti-Paste once again for a good helping of reinforcement. I cut the floor out temporarily so I could get to both sides. Even so, it was a bear getting the stuff in the inner pockets. That was a good stopping point, so I let it set up overnight. The next day I rolled the table out for some more sanding and bondo filling. Oh what fun. Didn't need much, and only a few areas needed minor spot putty. After working the edges a bit more, I blew all the dust off it and brought the case out for a test fit. Not bad! I may not even have to shave anything off. :) You might think I can put the ribs on now, but there's one more thing I have to do first. I want to add some detail to the surface: Pipes, various sized squares of paneling and such. It will be much easier doing it now, than trying to work in between the ribs. If all goes well, I can get that done this week, then rib next weekend.
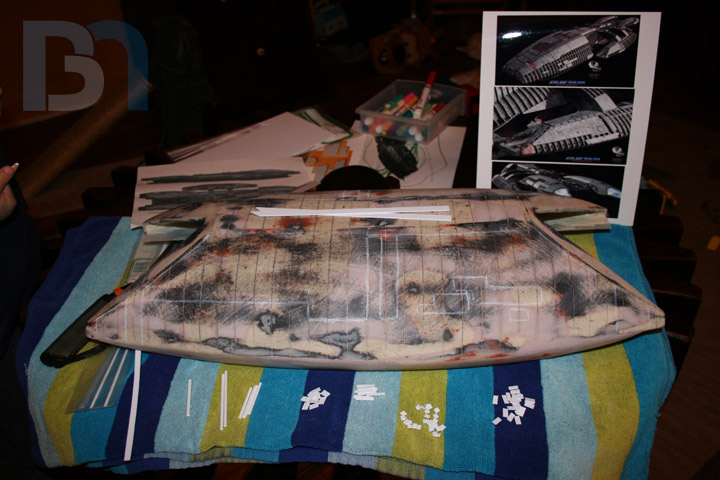
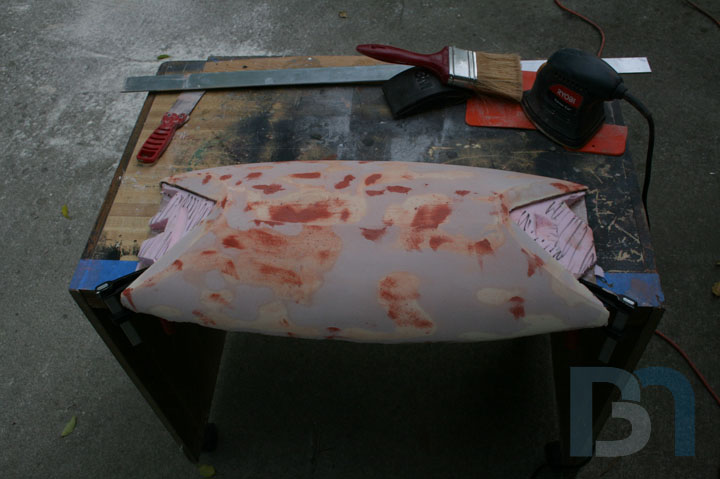
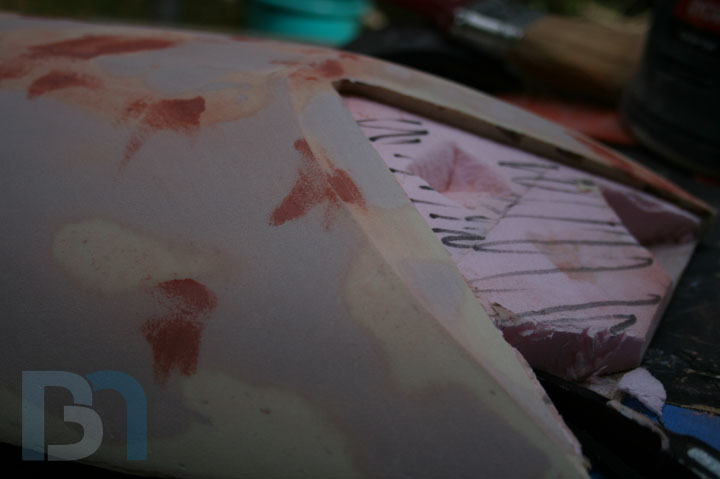
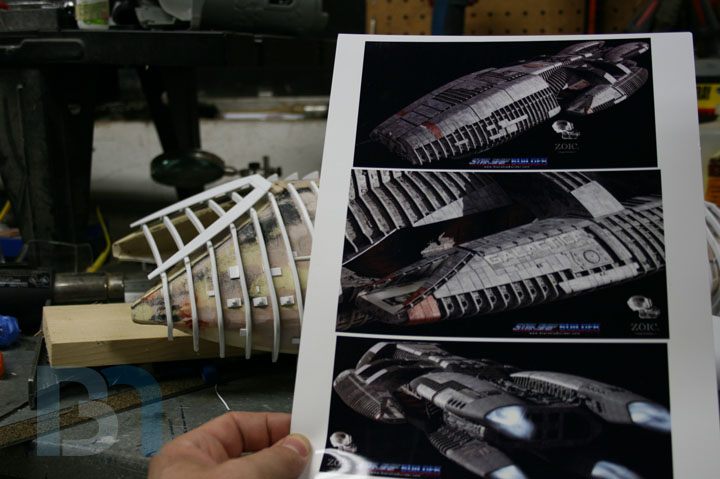
Last time we left off with finishing up the side skirts and preparing the surface for the detailing. Well I got most of it done over the last two days. I had just finished cutting up the first batch of squares of various sizes and shapes. You can see the printout of high res reference photos of the Galactica on the right (thank you Starshipbuilder.com ). :)
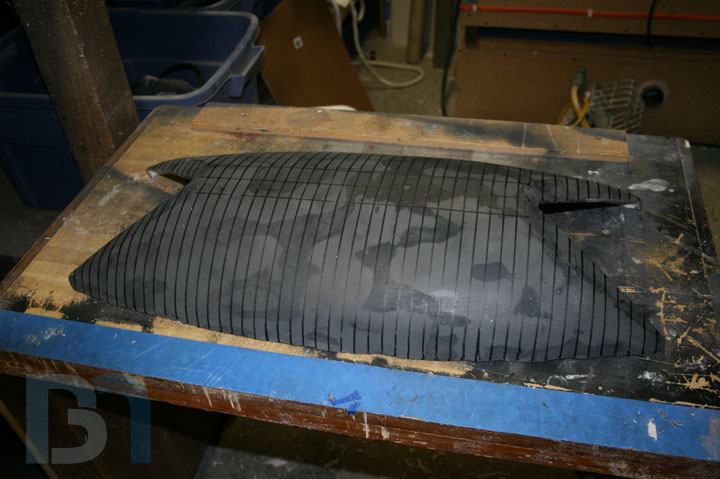
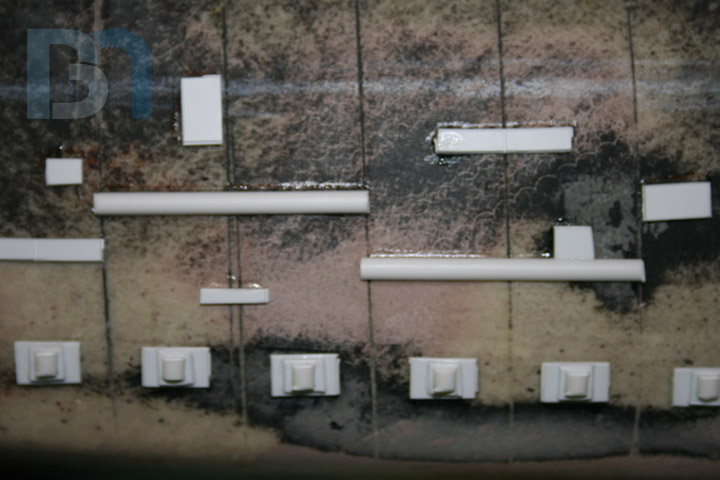
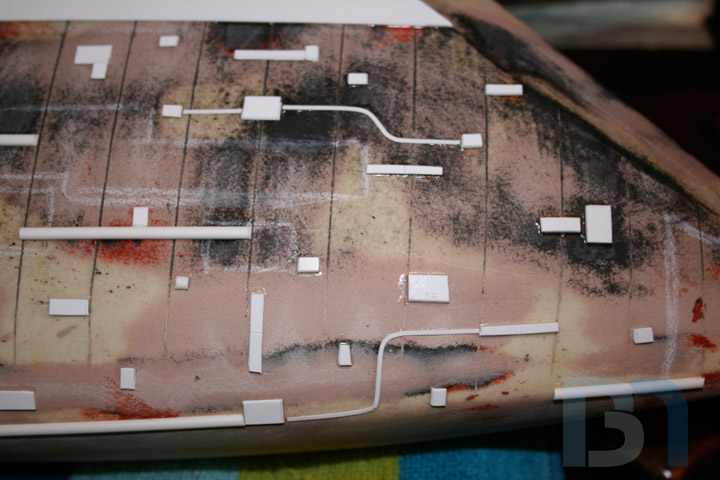
In order to save myself some work, I drew a rough outline of where the outer armor plating will be, so I knew where not to add the detail (since it will be covered up anyway.) I basically followed the ref photos loosely, just using them as a general guideline. I proceeded in a random fashion so as not to look too uniform. Keep in mind all this will be painted the same color in the end. For the detailing I used .040 Styrene sheet, and half-round styrene rod for the piping. The sheet came with ultra-thin flexible strips, so I decided to use them as well for a smaller size pipe. After adding a bit more detail on the side skirts, I think I can finally prepare the landing bay for the ribs.If it works out, it's going to look awesome!
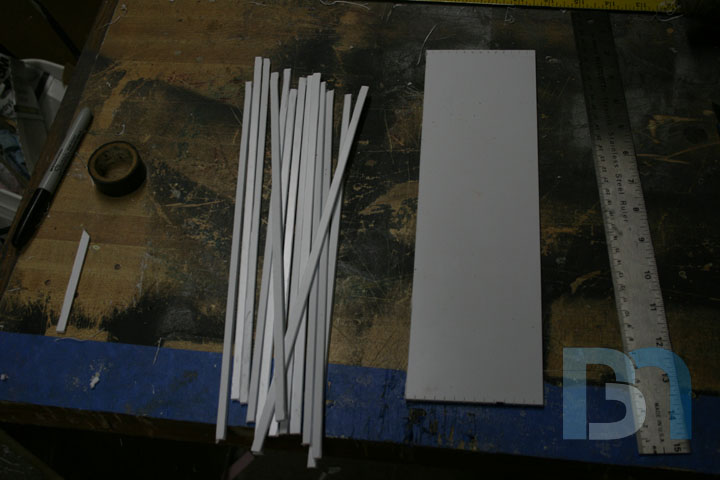
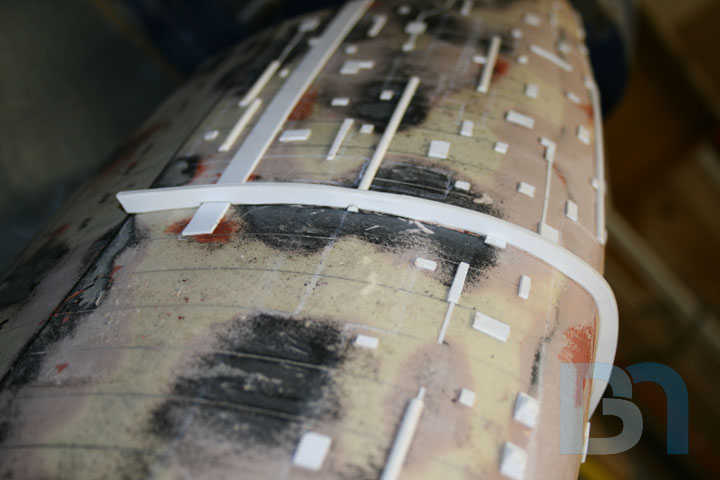
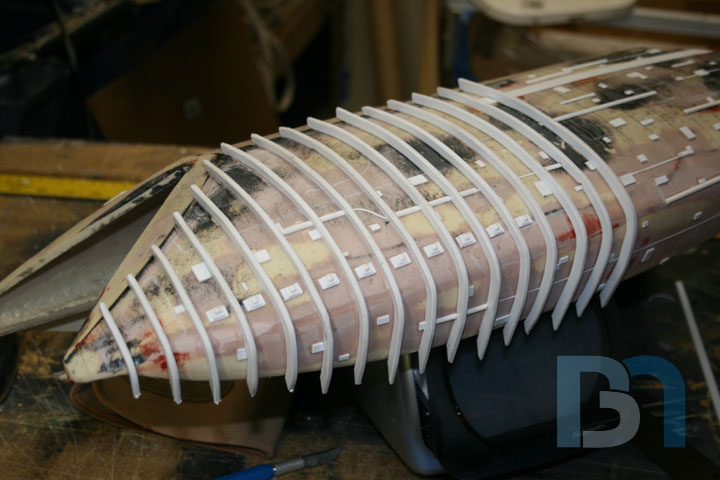
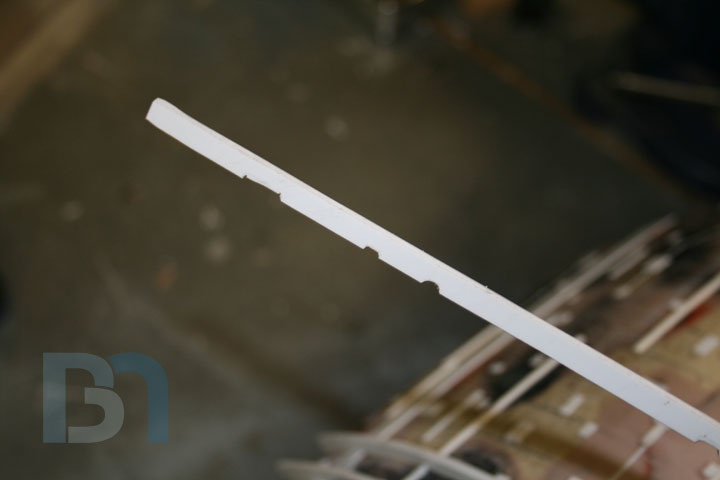
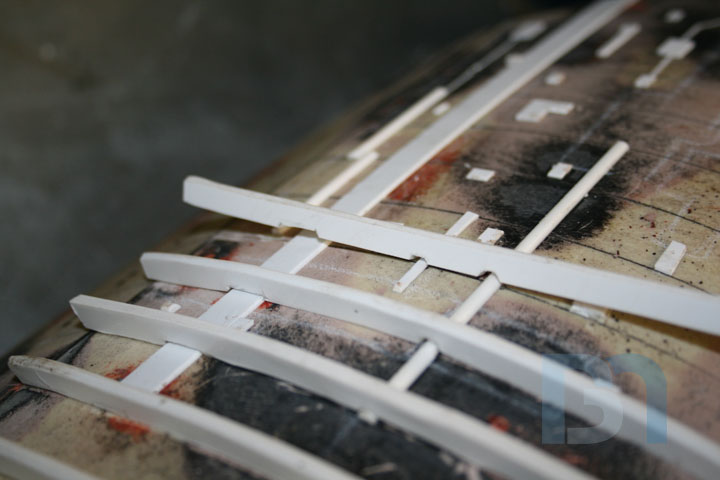
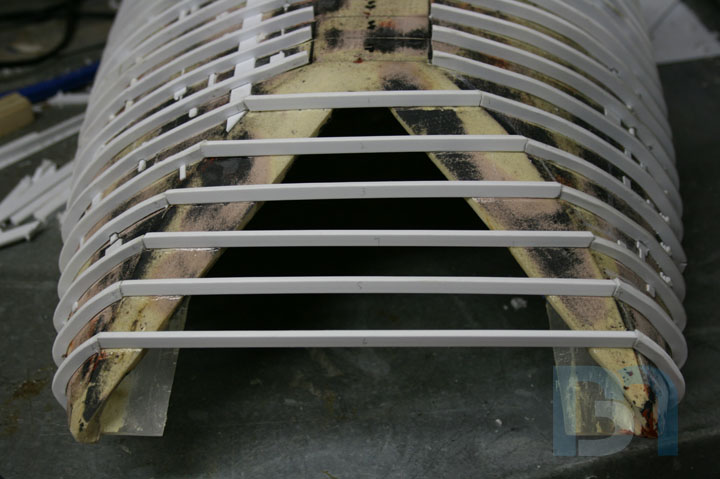
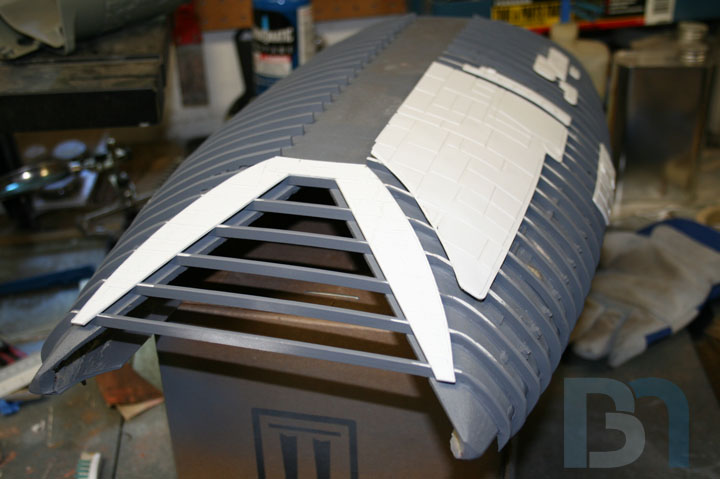
I was trying use foam strips, but they wouldn't stick. So I cut up a bunch of styrene strips and went to work.I have to fit each strip over the detail pieces. (had I known I was going to do it this way, I would have added the detailing after laying down the ribs.) The styrene is very soft. Doesn't need much heat to become pliable. Here's where I'm at, about 1/4 done. But you can kinda see what it will look like. Once all the ribbing is in place, I will add the outer armor pieces over select areas, then add detail to them.
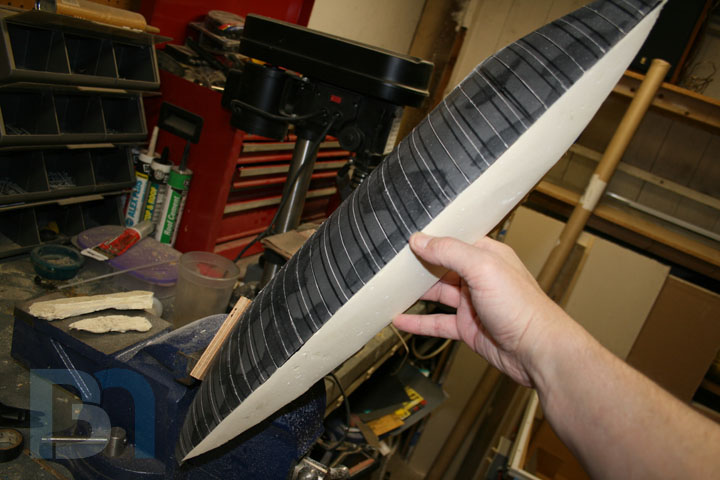
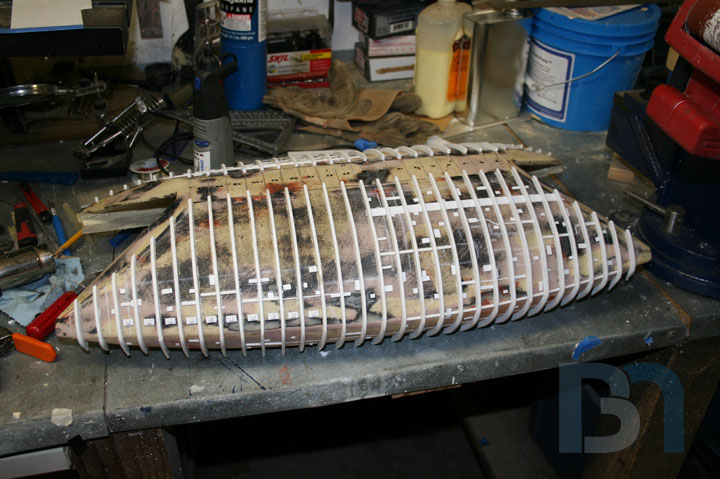
Almost got one side completed! :D
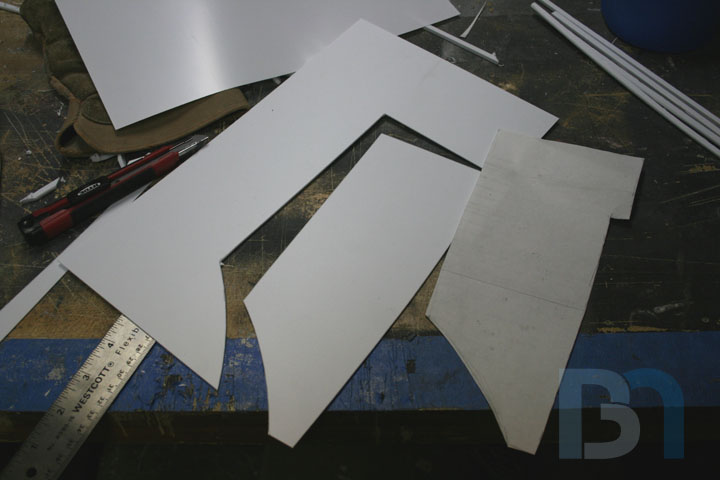

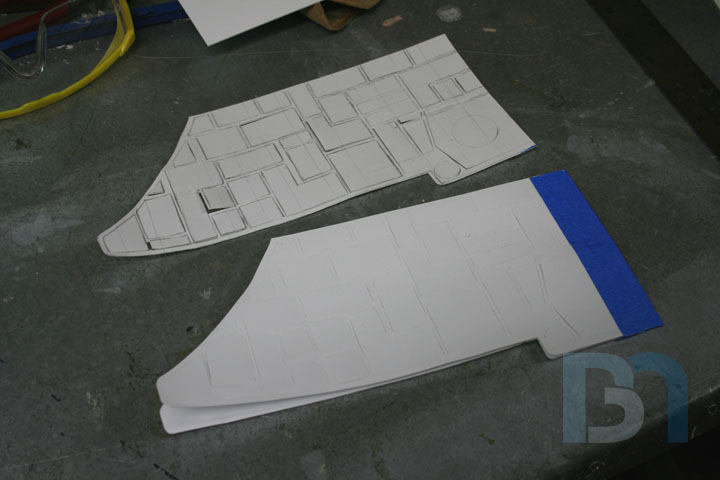


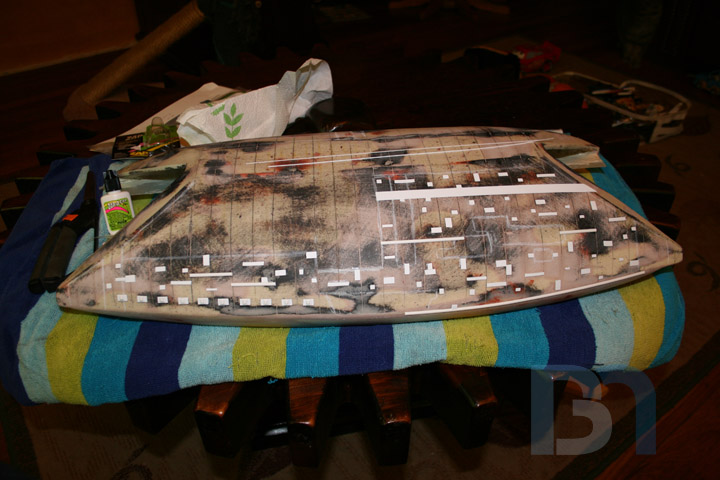
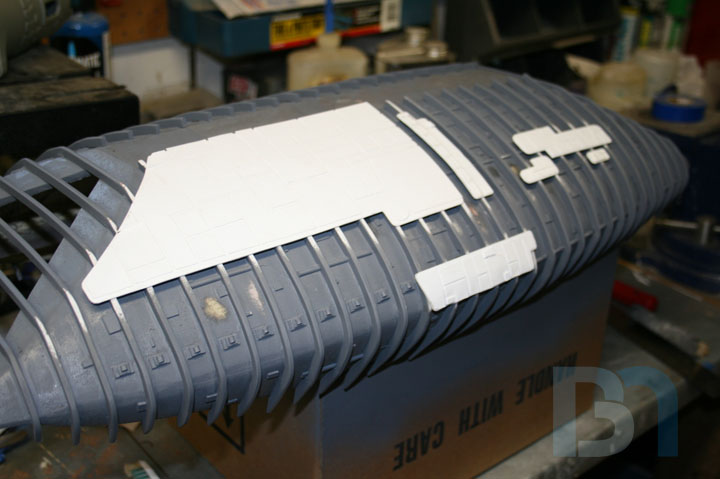
Well I finished one side of the ribbing, so I thought I would do one panel of the outer armor to see how it looks on there. I am using a couple sheets of styrene, one .040 and one .010. I took the sheet of .040 and cut out the shape, after making a paper pattern. Then on the .010, I outlined the same shape and drew some squares, triangles, and other shapes according to the reference pic. I took an exacto knife to it, almost cutting each shape out, but leaving them attached for now. I matched it up to the main piece and taped the ends together. Now that I mated them up how I want them, I open it up and put a dab of glue under each panel. Fold it back over and glue it down. After a few minutes, I can pull off the leftovers, completing all the cuts along the way. And voila! We have raised armor paneling! Much easier than cutting them out and pasting them on individually. A shot of the panel in place on the landing bay. It's just taped on for now, because I will need to paint underneath it before permanently gluing it down.

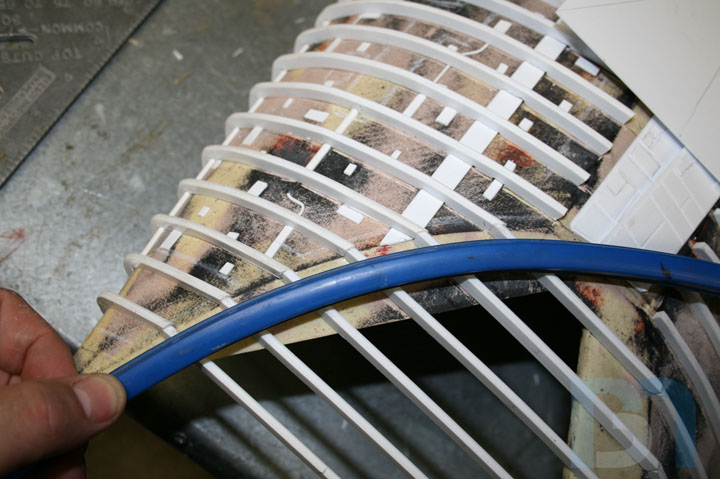
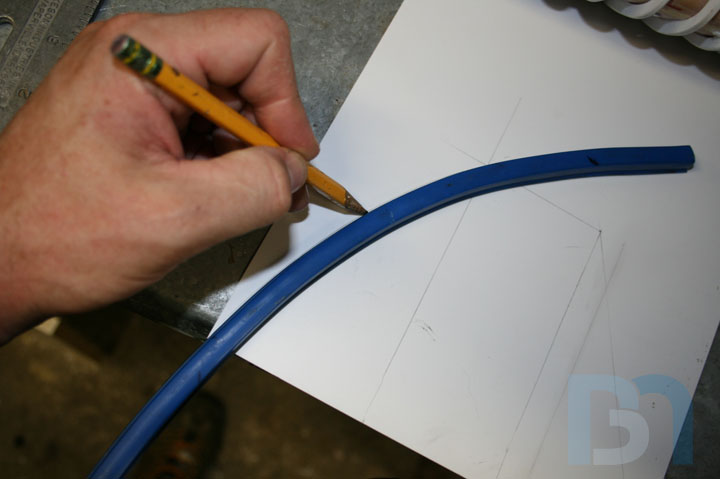
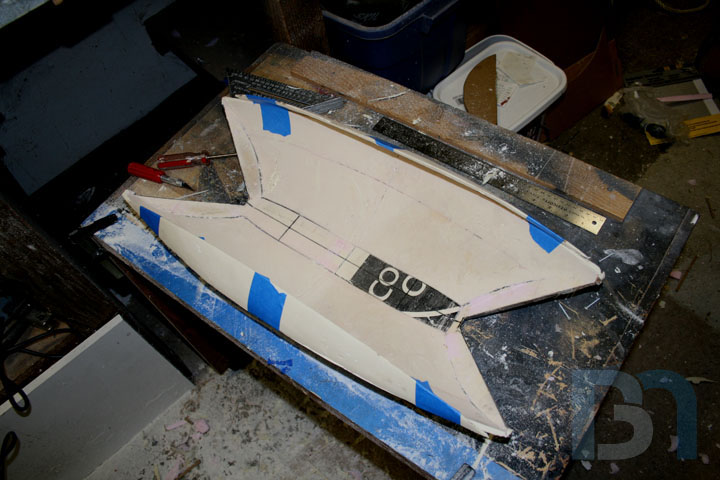
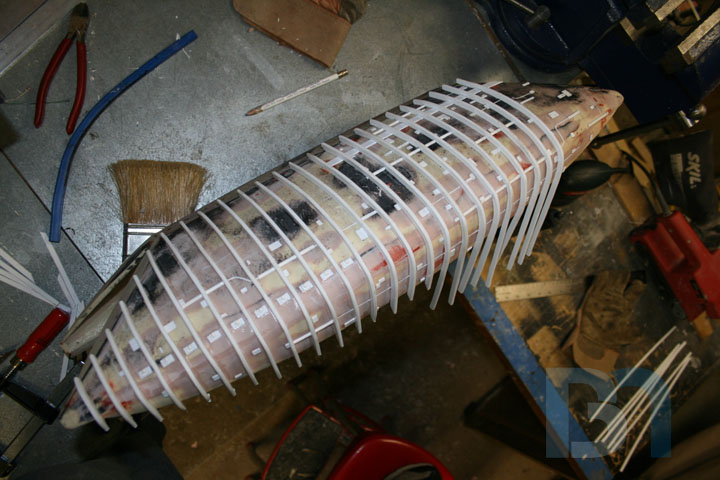
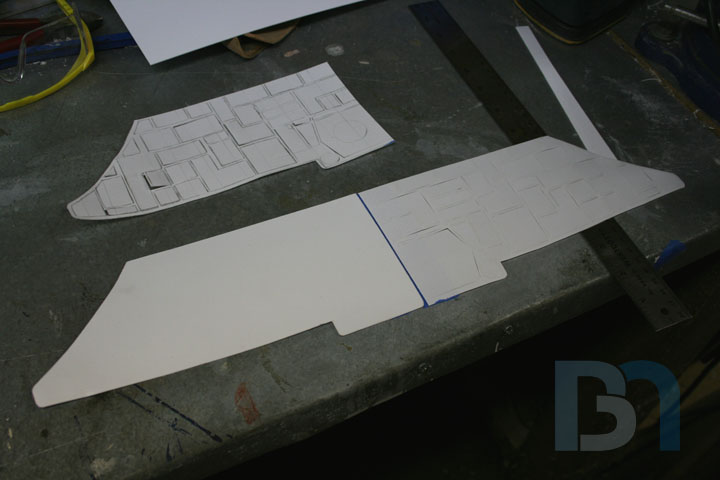
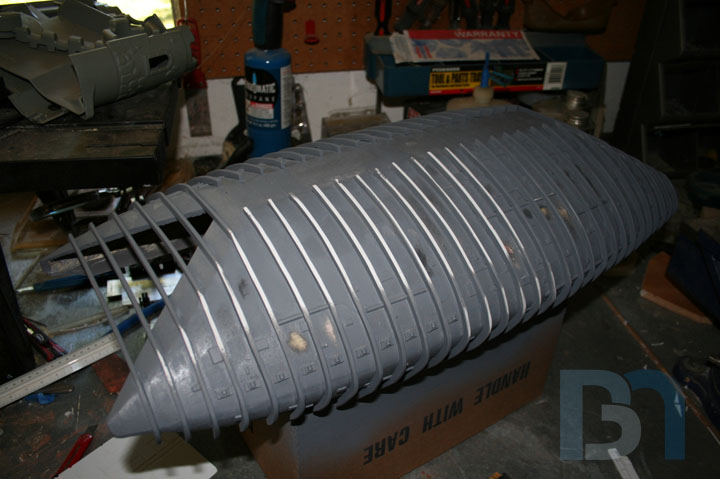
Ok I'm back on this project, and I actually got something new to show. Looking back at my last update, I had just finished the one side of ribs, and one armor panel. Well, I finally managed to finish the ribs on the other side, and much much more! After that exercise in tedium, I did the ends. The center areas will be cut out later, but I kept them intact for now. I won't know how much to cut off until I get the inside panels done. Then it was on to the rest of the outer armor plates. Going off the ref pics, I sketched out some designs and cut them out just as before. Using the same technique, I glued the smaller panels onto the main piece. More sketching, going off of my earlier chalk markings. For the end armor panels, had to do some measuring and a little geometry to get the right shape. I also needed to get the correct curves for the shape so they match. I brought my trusty flexible curve out again to transfer the curve from the main body to the sheet. I still need to do the top, but I can't do the top until I get all these panels glued on. I thought I would shoot a coat of primer onto the whole thing to get underneath the panels before I glued them on, but also because I wanted to see this thing all one color for once!

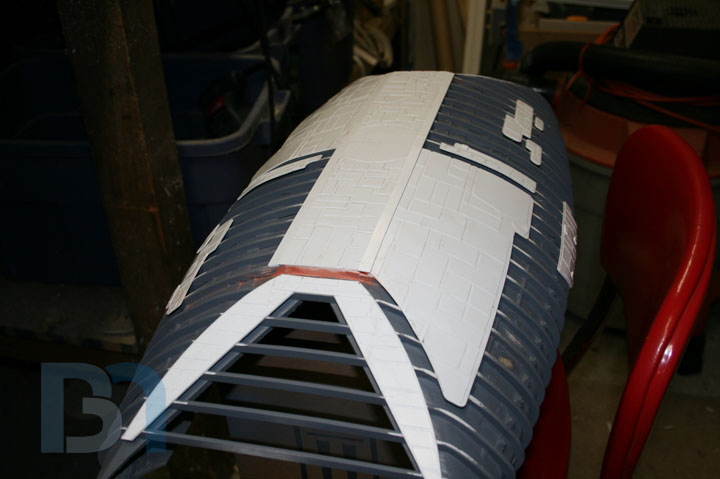
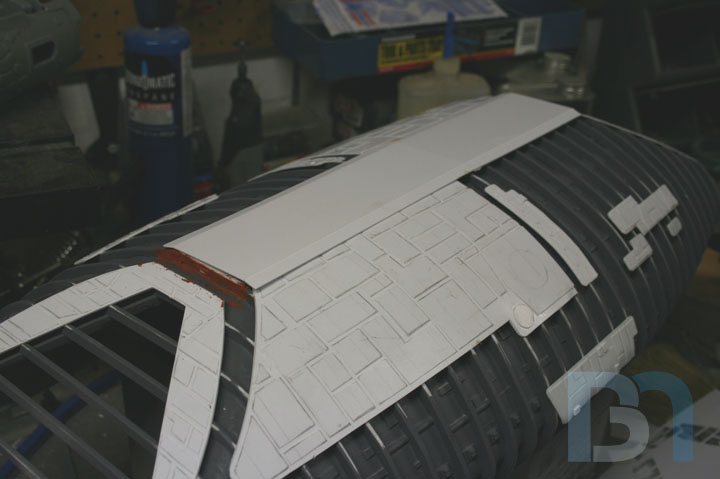
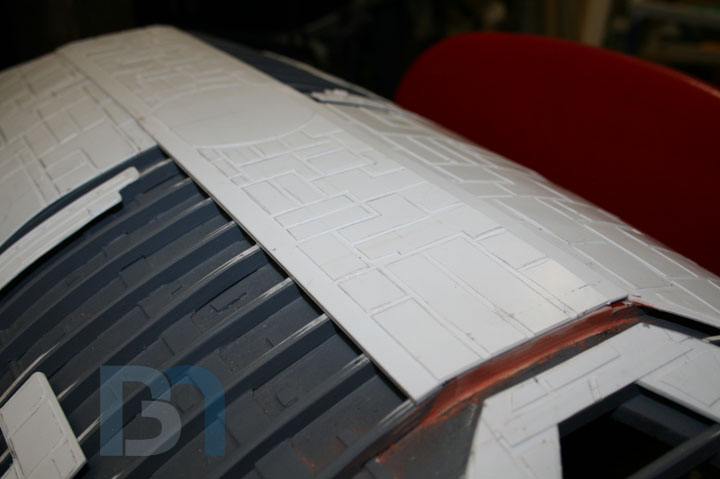
Was able to finally attach the outer armor panels to the ribs. I sanded off the areas and commenced gluing. Once I got both sides done, then I could measure out the top panel. Since this panel overlaps both sides, I had to wait til everything else was on before making this piece. I drew it up, cut it out (leaving the panels slightly attached), and glued them down. I had to add a styrene rib under each end to sort of cap it off and give it something for the edge to adhere to. After gluing that down, I applied some glazing putty to smooth out the seams. Once painted, it will look like a contiguous part.